Creating a Notification
Android - Building Apps for Wearables/Adding Wearable Features to Notifications 2014. 8. 7. 13:37알림 생성
웨어러블 장치에서 받는 휴대용 장치 알림을 만들기 위해 NotificationCompat.Builder를 사용해라. 이 클래스로 알림을 만들 때, 시스템은 휴대용 장치 혹은 웨어러블 장치에 제대로 표시되는지 감시한다.
메모: RemoteViews를 사용한 알림은 사용자 레이아웃이 제거되고 웨어러블 장치만 텍스트와 아이콘을 표시할 수 있다. 하지만 당신은 웨어러블 장치에서 동작하는 웨어러블 앱을 만듦으로써 사용자 카드 레이아웃을 이용하는 사용자 알림을 만들 수(create custom notifications) 있다.
필수 클래스들의 Import
필수 패키지들의 import를 위해 당신의 build.gradle 파일에 이 라인을 추가하라:
compile "com.android.support:support-v4:20.0.+"
이제 당신은 프로젝트는 필수 패키지들로의 접근 권한을 갖게되고, 지원 라이브러리로부터 필수 클래스들을 import 하라:
import android.support.v4.app.NotificationCompat;
import android.support.v4.app.NotificationManagerCompat;
import android.support.v4.app.NotificationCompat.WearableExtender;
Notification Builder를 이용한 알림 생성
v4 support library는 안드로이드 1.6(API 버전 4) 이상과 호환을 유지하며, 액션 버튼 및 큰 아이콘과 같은 최신 알림 기능을 이용해 알림을 만들 수 있도록 해준다.
지원 라이브러리를 이용한 알림을 만들기 위해, 당신은 NotificationCompat.Builder 인스턴스를 생성하고 notify()를 통한 알림을 이슈한다. 예를 들면:
int notificationId = 001;
// Build intent for notification content
Intent viewIntent = new Intent(this, ViewEventActivity.class);
viewIntent.putExtra(EXTRA_EVENT_ID, eventId);
PendingIntent viewPendingIntent =
        PendingIntent.getActivity(this, 0, viewIntent, 0);

NotificationCompat.Builder notificationBuilder =
        new NotificationCompat.Builder(this)
        .setSmallIcon(R.drawable.ic_event)
        .setContentTitle(eventTitle)
        .setContentText(eventLocation)
        .setContentIntent(viewPendingIntent);

// Get an instance of the NotificationManager service
NotificationManagerCompat notificationManager =
        NotificationManagerCompat.from(this);

// Build the notification and issues it with notification manager.
notificationManager.notify(notificationId, notificationBuilder.build());
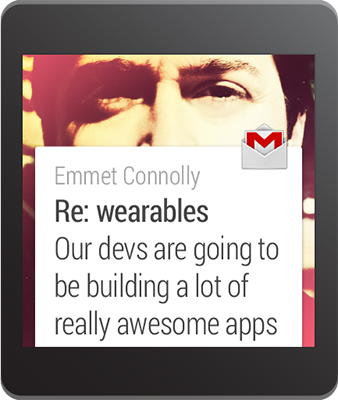
휴대용 장치상에 알림이 나타났을 때, 사용자는 알림을 터치하여 setContentIntent()메소드에 의해 특정 PendingIntent를 발생시킬 수 있다. 이 알림이 안드로이드 웨어러블 장치에 표시될 때, 사용자는 휴대용 장치에서 발생한 알림을 왼쪽으로 스와이프 하여 열기 액션을 수행할 수 있다.

액션 버튼 추가
setContentIntent()에 정의된 기본 내용 액션외에, 당신은 addAction() 메소드에 PendingIntent를 보내 다른 액션을 추가할 수 있다.
예를들어, 다음의 코드는 위에서 본 알림과 동일하지만, 지도 위에 이벤트 위치를 볼 수 있는 액션을 추가하는 것을 보여준다.
// Build an intent for an action to view a map
Intent mapIntent = new Intent(Intent.ACTION_VIEW);
Uri geoUri = Uri.parse("geo:0,0?q=" + Uri.encode(location));
mapIntent.setData(geoUri);
PendingIntent mapPendingIntent =
        PendingIntent.getActivity(this, 0, mapIntent, 0);

NotificationCompat.Builder notificationBuilder =
        new NotificationCompat.Builder(this)
        .setSmallIcon(R.drawable.ic_event)
        .setContentTitle(eventTitle)
        .setContentText(eventLocation)
        .setContentIntent(viewPendingIntent)
        .addAction(R.drawable.ic_map,
                getString(R.string.map), mapPendingIntent);
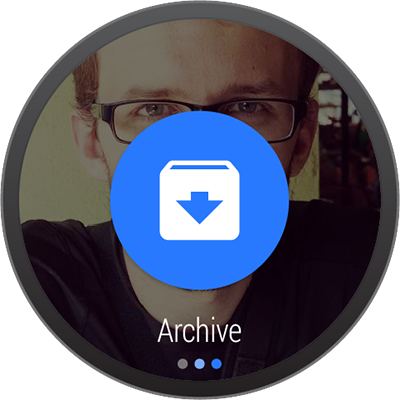
휴대용 장치에서 액션은 알림에 추가적인 버튼으로 부착되어 나타난다. 웨어러블 장치에서 액션은 사용자가 알림을 왼쪽으로 스와이프 했을 때 큰 버튼으로 나타난다. 사용자가 액션을 탭 할때, 관련 인텐트는 휴대용 장치에서 발생된다.
조언: 만약 알림이 "응답" 액션을 갖고있다면(가령 메시징 앱), 당신은 안드로이드 웨어러블 장치로부터 직접 음성 입력 답변을 활성화하여 동작을 향상시킬 수 있다. 추가적인 정보가 필요하다면, Receiving Voice Input from a Notification를 참조하라.
웨어러블 장치만의 액션 명시
만약 당신이 휴대용 장치의 그것들과는 다른 웨어러블 장치에서 이용할 수 있는 액션을 원한다면, WearableExtender.addAction()을 사용해라. 이 메소드로 액션을 추가하면, 웨어러블 장치는 NotificationCompat.Builder.addAction()에 추가 된 어떠한 다른 액션도 보여지지 않는다. 즉, WearableExtender.addAction()으로 추가된 액션만 웨어러블 장치에서 보이고 휴대용 장치에서는 나타나지 않는다.
// Create an intent for the reply action
Intent actionIntent = new Intent(this, ActionActivity.class);
PendingIntent actionPendingIntent =
        PendingIntent.getActivity(this, 0, actionIntent,
                PendingIntent.FLAG_UPDATE_CURRENT);

// Create the action
NotificationCompat.Action action =
        new NotificationCompat.Action.Builder(R.drawable.ic_action,
                getString(R.string.label, actionPendingIntent))
                .build();

// Build the notification and add the action via WearableExtender
Notification notification =
        new NotificationCompat.Builder(mContext)
                .setSmallIcon(R.drawable.ic_message)
                .setContentTitle(getString(R.string.title))
                .setContentText(getString(R.string.content))
                .extend(new WearableExtender().addAction(action))
                .build();
큰 뷰 추가

당신은 알림에 "큰 뷰" 스타일 중 하나를 추가하여 알림에 확장된 텍스트 내용을 삽입할 수 있다. 휴대용 장치에서 사용자는 확대된 알림으로 큰 뷰의 내용을 볼 수 있다. 웨어러블 장치에서는 큰 뷰 내용은 기본적으로 표시된다.
당신의 알림을 확장된 내용에 추가하기 위해, BigTextStyle 또는 InboxStyle 중 하나의 인스턴스를 전달하여, NotificationCompat.Builder의 오브젝트 상에서 setStyle()을 호출하면 된다.
예를들어, 다음 코드는 완벽한 이벤트 설명(setContentText()를 위해 마련된 공간 안에 알맞게 들어가는 것 보다 더 많은 텍스트를 포함)을 포함하기 위해 이벤트 알림에 NotificationCompat.BigTextStyle 인스턴스를 추가하는 것이다.
// Specify the 'big view' content to display the long
// event description that may not fit the normal content text.
BigTextStyle bigStyle = new NotificationCompat.BigTextStyle();
bigStyle.bigText(eventDescription);

NotificationCompat.Builder notificationBuilder =
        new NotificationCompat.Builder(this)
        .setSmallIcon(R.drawable.ic_event)
        .setLargeIcon(BitmapFractory.decodeResource(
                getResources(), R.drawable.notif_background))
        .setContentTitle(eventTitle)
        .setContentText(eventLocation)
        .setContentIntent(viewPendingIntent)
        .addAction(R.drawable.ic_map,
                getString(R.string.map), mapPendingIntent)
        .setStyle(bigStyle);
당신은 setLargeIcon() 메소드를 사용하여 어떠한 알림에 큰 배경 이미지를 추가할 수 있다는 것을 명심하라. 큰 이미지들에 관한 알림들의 디자인 관련 정보가 더 필요하다면, Design Principles of Android Wear를 참조하라.
알림을 위한 웨어러블 기능 추가
만약 당신이 알림에 웨어러블-특유 옵션(가령 내용의 추가적인 명시나 사용자가 음성 입력의 텍스트 응답을 지시)의 추가가 필요하다면, 당신은 옵션을 명시하여 NotificationCompat.WearableExtender클래스를 사용할 수 있다. 이 API를 사용하려면:
- WearableExtender 인스턴스를 생성하고, 알림을 위한 웨어러블-특유 옵션을 설정하라.
NotificationCompat.Builder인스턴스를 생성하고, 이전 레슨에서 설명했듯이 당신의 알림에 필요한 속성을 설정하라.- 알림상의
extend()를 호출하고WearableExtender를 전달한다. 이는 알림에 웨어러블 장치 설정을 적용한다. build()를 호출하여 알림을 만든다.
예를들어, 다음 코드는 알림 카드로부터 앱 아이콘의 삭제를 하기 위해 setHintHideIcon() 메소드를 호출한다.
// Create a WearableExtender to add functionality for wearables
NotificationCompat.WearableExtender wearableExtender =
        new NotificationCompat.WearableExtender()
        .setHintHideIcon(true);

// Create a NotificationCompat.Builder to build a standard notification
// then extend it with the WearableExtender
Notification notif = new NotificationCompat.Builder(mContext)
        .setContentTitle("New mail from " + sender)
        .setContentText(subject)
        .setSmallIcon(R.drawable.new_mail);
        .extend(wearableExtender)
        .build();
setHintHideIcon() 메소드는 NotificationCompat.WearableExtender로 사용할 수 있는 새로운 알림 특징 중 하나의 예제이다.
만약 추후에 당신이 웨어러블 특유의 옵션을 읽고 필요로 한다면, 설정을 위해 해당하는 get 메소드를 사용하라. 이 예제는 알림 아이콘의 표시 여부를 가져오기 위해 getHintHideIcon() 메소드를 호출한다:
NotificationCompat.WearableExtender wearableExtender =
        new NotificationCompat.WearableExtender(notif);
boolean hintHideIcon = wearableExtender.getHintHideIcon();
알림 전송
당신의 알림들의 전송을 원할 때, 항상 NotificationManagerCompat API 대신 NotificationManagerCompat을 사용하라:
// Get an instance of the NotificationManager service
NotificationManagerCompat notificationManager =
        NotificationManagerCompat.from(mContext);

// Issue the notification with notification manager.
notificationManager.notify(notificationId, notif);
만약 프레임워크의 NotificationManager를 사용하고, NotificationCompat.WearableExtender의 몇몇 기능이 작동하지 않는다면, 반드시 NotificationCompat를 사용하라.
NotificationCompat.WearableExtender wearableExtender =
        new NotificationCompat.WearableExtender(notif);
boolean hintHideIcon = wearableExtender.getHintHideIcon();
NotificationCompat.WearableExtender API는 알림들에 부가적인 페이지를 추가 및 알림들의 스택, 그 밖에 여러가지를 허용한다. 이러한 특징들에 관해 배우기 위해서는 다음 단원들을 계속한다.
'Android - Building Apps for Wearables > Adding Wearable Features to Notifications' 카테고리의 다른 글
| Stacking Notifications (0) | 2014.08.19 |
|---|---|
| Adding Pages to a Notification (0) | 2014.08.18 |
| Receiving Voice Input in a Notification (0) | 2014.08.13 |
| Adding Wearable Features to Notifications (0) | 2014.08.05 |


